Your friendly, no-stress guide to stepping on, balancing, and cruising with confidence, from your very first wobble to smooth, easy rides.
Learning how to use a hoverboard looks a lot scarier than it really is. The first time you watch one glide across a room, you might think it takes special balance or years of practice. It doesn’t. Most people learn the basics in a single afternoon, and kids often pick it up even faster. A hoverboard does most of the balancing work for you, so your only real job is to relax, stand tall, and let the board do its thing.
This guide walks you through every step, from strapping on your gear to your first wobble-free glide. We’ll cover how to get on without falling, how to move forward and turn, how to stop and step off safely, and how to keep your board charged and healthy for years. Whether you just unboxed your first board or you’re helping a nervous kid learn, you’ll find simple, friendly advice you can use right away.
Before we roll, one quick promise: go slow. Almost every rider who struggles made the same mistake, and that mistake is rushing. Take it one small step at a time and you’ll be cruising with a big grin before you know it.
What You Need Before Your First Ride
Good rides start before you ever step on the board. A few minutes of prep make the difference between a smooth first try and a bruised knee. The three things that matter most are safety gear, a fully charged battery, and the right practice spot.
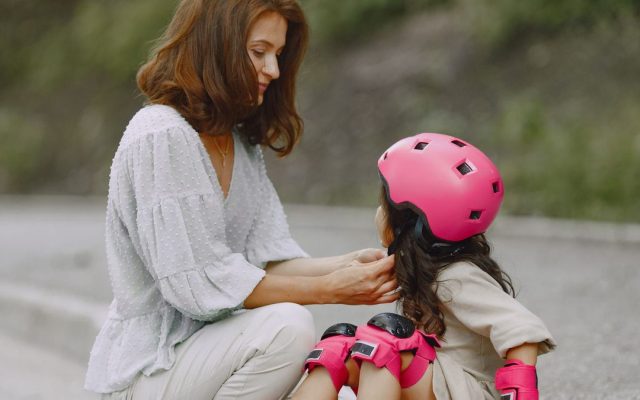
Start with protection. Even at slow speeds, a fall onto hard ground can sting, and your wrists take the worst of it when you reach out to catch yourself. A helmet is a must, especially for kids. Wrist guards are the single most valuable piece of gear, because wrist injuries are the most common hoverboard injury by far.
Next, charge the battery fully and unplug the board before your first ride. A low battery can shut the board down mid-glide, which is exactly when you don’t want a surprise. Then find your practice spot: a flat, smooth, open area with nothing to bump into. An empty garage, a quiet driveway, or a smooth patch of parking lot are all perfect. Skip slopes, gravel, and crowds while you’re learning.
Finally, set the board on level ground and power it on. Let it sit flat for a second so it can self-level. If one side feels tilted when you step on, the board may need recalibrating, which we’ll cover later. A level board is a friendly board.
- A well-fitting helmet (a bike or skate helmet works fine)
- Wrist guards, the most important pad for the most common injury
- Knee and elbow pads, especially for younger or nervous riders
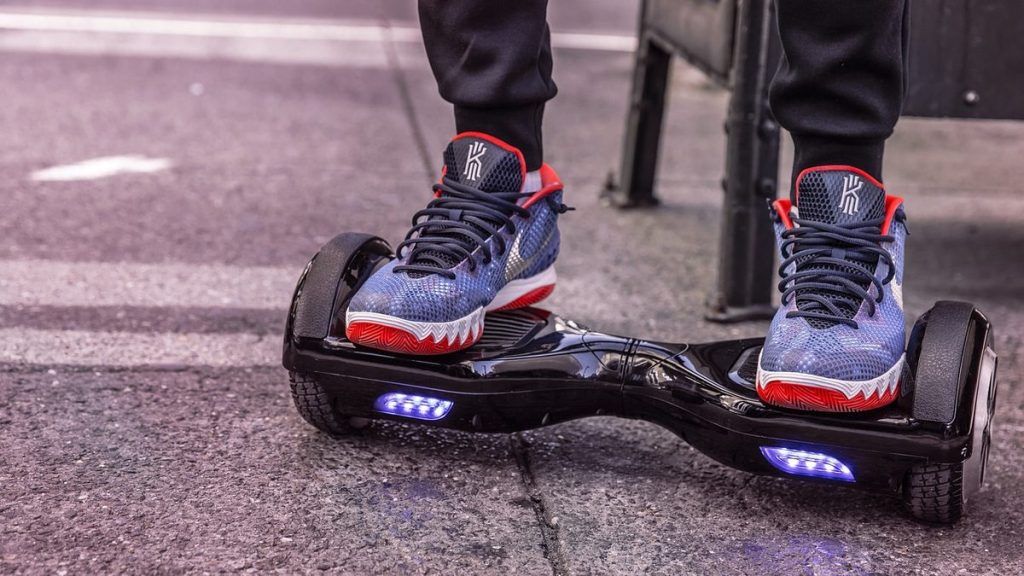
- Flat, thin-soled shoes so you can feel the footpads
- Long sleeves and pants for a little extra skin protection
| Wheel Size | Best For | Where It Shines | Typical Rider |
|---|---|---|---|
| 6.5 inch | Kids, beginners, indoors | Smooth pavement and indoor floors | First-timers and children |
| 8 inch | All-around everyday riding | Pavement and packed dirt | Teens and adults |
| 8.5 inch | Mixed and light off-road | Grass, gravel, and small bumps | Older kids and adults |
| 10 inch | Off-road and all-terrain | Grass, dirt, gravel, and inclines | Adults and heavier riders |
How to Get On a Hoverboard Without Falling
Getting on is the part that scares most beginners, but there’s a simple trick: do it one foot at a time, and never lean forward as you step on. If you lean in, the board thinks you want to zoom off. Stay tall and centered instead.
Stand right behind the board, not in front of it, so that if it rolls, it moves away from you. Keep a wall, railing, or a friend’s hand nearby for support. Then follow these three steps and take your time between each one.
Step 1: Plant your strong foot
Place your dominant foot on one footpad, close to the wheel, as flat and straight as you can. Keep this foot firm and level. Don’t press your toes or heel down yet, just rest it flat so the board stays still.
Step 2: Step up quickly
In one smooth motion, bring your second foot up onto the other pad. Going slow here actually makes it harder. A quick, confident step keeps the board balanced. Aim to land with both feet flat and level, right over the wheels.
Step 3: Stand tall and steady
Once both feet are on, stand up straight with your feet shoulder-width apart. Keep your weight even. The board will gently balance itself beneath you. Breathe, relax your shoulders, and simply stand still for a few seconds before trying anything else.
Balancing and Moving Forward and Back
Here’s the secret that makes everything click: you steer a hoverboard with your ankles, not your whole body. The movements are tiny. Think of gently pressing a gas pedal, not throwing your weight around.
First, nail your posture. Keep your knees slightly bent, your back straight, and your eyes up and forward, like you’re looking across a room. The most common beginner mistake is staring down at your feet, which throws off your balance every single time. Relax your shoulders too. A stiff, tense body wobbles; a loose, calm body glides.
To move forward, tilt your toes down just a little, leaning ever so slightly forward from your ankles. The board rolls forward. To slow down or reverse, ease your toes up and lean back a touch. Start with the gentlest pressure you can manage. These boards are sensitive, and new riders almost always lean too far at first.
Practice rolling forward a few feet, then gently coming back to a stop. Then try rolling backward slowly. Do this over and over until it feels natural. Keep every movement small and smooth. If you feel yourself speeding up more than you’d like, just straighten back to a neutral stand and the board will ease off on its own.
Turning and Stopping Safely
Once you can roll forward and back, turning is the fun part, and it’s easier than it sounds. To turn, you press one foot’s toes down while keeping the other foot flat. Push your right toes down to curve left, and push your left toes down to curve right. It feels a little backward at first, so start with big, lazy turns in an open space before trying anything tight.
A great way to practice is to trace slow, wide circles across your driveway, then link them into gentle figure-eights. Keep the inputs small and let the board ease around the curve. The more relaxed you stay, the smoother and tighter your turns become.
Stopping is simply the opposite of starting. Bring your body back to a tall, neutral, balanced position and the board rolls to a soft halt. There’s no hand brake to squeeze. Just settle your weight evenly and relax.
Getting off safely matters just as much as getting on. Never jump off a moving board, because that’s how most people fall. Instead, come to a full stop, then step off backward with one foot while keeping your weight on the other foot until you’re safely on the ground.
Charging Your Hoverboard Safely
A hoverboard is only as safe as the way you charge it. The good news is that a UL2272-certified board is built to strict battery standards. The rest is up to you, and the rules are refreshingly simple.
Always use the charger that came with your board, or an official replacement from the maker. Cheap, mismatched chargers can push the wrong voltage into the battery and cause overheating. Charge with the board turned off, on a hard, non-flammable surface like tile or concrete. Never charge on a bed, couch, or carpet, because soft surfaces trap heat.
Most hoverboard problems happen during or right after charging, so this is where good habits pay off the most. Stay nearby while it charges, and unplug it as soon as it’s full, which usually takes two to five hours. Let the board cool down after a ride before you plug it back in.
For long-term battery health, try not to run the board all the way to empty before recharging. And if you’re storing it for a month or more, leave it at about half charge in a cool, dry place. A little care here keeps your battery strong for years.
- Use only the original or a manufacturer-approved charger
- Charge on a hard, non-flammable surface away from anything that burns
- Turn the board off while it charges
- Stay nearby and unplug it once it’s full (usually 2 to 5 hours)
- Let the board cool down before charging right after a ride
Where You Can Ride a Hoverboard
Knowing how to ride is one thing; knowing where you’re allowed to ride is another. Hoverboard rules in the United States are a patchwork that changes from city to city, so a quick check before you head out can save you a fine or an awkward conversation with security.
As a rule, hoverboards are legal to own and ride on private property just about anywhere. In public, most places allow them on sidewalks, bike paths, and quiet, low-traffic streets. But some big cities are much stricter. In New York City, for example, hoverboards are treated like motor vehicles and aren’t allowed on streets or sidewalks at all.
California takes a middle path. You can ride on bikeways and slower roads, but you generally must be at least 16 years old and wearing a helmet, and you can’t ride on roads with speed limits above 35 mph. Other states and towns each have their own twist, which is why local rules always win.
Schools, malls, airports, and many businesses set their own bans too, so don’t assume you can ride indoors in public. When in doubt, stick to private property or look up your city and county rules first.
- Private property such as your yard, driveway, or garage: almost always fine
- Sidewalks and bike paths: often allowed, but not everywhere
- Busy roads: usually off-limits, and never safe for beginners anyway
- Schools, malls, and airports: frequently banned, so always check first
Common Beginner Problems and Easy Fixes
Even with a perfect start, you’ll hit a few bumps while you learn. Almost all of them have quick fixes, so don’t panic if something feels off. Here are the four issues new riders run into most, and how to sort each one out.
The board feels tilted or drifts to one side
This usually means it needs recalibrating. Turn it off, set it on flat ground so both footpads are perfectly level, then follow your manual’s reset steps (often holding the power button for 5 to 10 seconds until the lights flash). Recalibrating resets the board’s internal balance sensor to level.
It beeps and flashes at me
Beeping usually means you’re leaning too far, going too fast, or the battery is running low. Ease back to a neutral stand and slow down. If it keeps beeping with a red light, it’s simply telling you it’s time to charge.
One side won’t turn on or respond
Make sure both footpads click when pressed and that the board is fully charged. If one pad still feels dead after a full charge, stop riding and contact the maker. A pad that won’t wake up can mean a loose connection that needs service.
I keep wobbling and can’t relax
Slow everything down. Bend your knees, look up, and loosen your muscles. Hold a wall and just stand still until the shakiness fades. Confidence is a skill, and it comes surprisingly fast with a few short practice sessions.
| Model | Top Speed | Range | Max Weight | Wheels | UL2272 |
|---|---|---|---|---|---|
| Hover-1 Dream | 7 mph | Up to 6 mi | 220 lbs | 6.5 in | Yes |
| Gyroor G13 | 6.2 mph | Up to 8 mi | 176 lbs | 6.5 in | Yes |
| Gyroor Warrior 8.5 | 10 mph | Up to 9 mi | 220 lbs | 8.5 in | Yes |
| Day | Focus | Goal for the Day |
|---|---|---|
| Day 1 | Mounting and standing still | Stand steady for 20 to 30 seconds |
| Day 2 | Rolling forward and back | Smooth, slow starts and stops |
| Day 3 | Turning | Wide, relaxed left and right turns |
| Days 4-5 | Control | Link figure-eights and stop on a spot |
| Days 6-7 | Confidence | Longer rides on different smooth surfaces |
Common Mistakes (and How to Fix Them)
Fix: Lift your eyes and lock them on a fixed point ahead, like a doorknob or a tree. Looking down throws off your balance instantly, while looking forward steadies you right away.
Fix: Set the board flat on the ground and let it self-level before you climb on. If it feels tilted, recalibrate it by holding the power button until the lights flash.
Fix: Step on flat-footed with your weight centered over your ankles, not tipped forward. Leaning in tells the board to take off before you’re ready for it.
Fix: Come to a complete stop first, then step off backward one foot at a time. Hopping off a moving board is the top cause of beginner falls.
Pro Tips
- 💡 Keep your knees soft and slightly bent. Stiff, locked legs make you wobble, while loose knees soak up the little movements.
- 💡 Look forward at a fixed point, never down at your feet. Your balance quietly follows wherever your eyes go.
- 💡 Make every input tiny at first. Hoverboards are very sensitive, and gentle toe pressure is all it takes to move.
- 💡 Wear flat, thin-soled shoes so you can actually feel the footpads under your feet.
- 💡 If the board drifts or feels off-balance, recalibrate it on level ground before your next ride.
A Real-Life Example
When my neighbor’s ten-year-old, Maya, got a hoverboard for her birthday, she was terrified to step on it. We started in the garage with her holding the workbench, one foot at a time, just standing still. Ten minutes later she let go of the bench. Twenty minutes after that she was doing slow laps around the driveway, laughing the whole way.
Her dad, who swore he was ‘too old for this,’ tried it that same evening. He looked down at his feet, leaned too far, and stepped off twice before it clicked. Once he kept his eyes up and his moves tiny, he got it too. That’s the pattern with almost every rider: a few nervous minutes, one ‘aha,’ and then pure fun.
Frequently Asked Questions
No, most people learn the basics in about 10 to 20 minutes. The board does the balancing for you, so your main job is to relax, stand tall, and keep your movements small. Kids often pick it up even faster than adults. The trick is to go slow, use a wall for your first few tries, and not rush into moving before you can stand still comfortably.
Put your dominant foot on first. Place it flat and straight on one footpad, close to the wheel, while you steady yourself on a wall or a friend. Then bring your other foot up quickly and smoothly onto the second pad. Standing right behind the board, rather than in front of it, keeps it from rolling toward you as you climb on.
To stop, bring your body back to a tall, neutral, balanced position and the board rolls gently to a halt. There’s no hand brake, so you simply even out your weight and relax. To get off, wait until the board is fully stopped, then step off backward one foot at a time. Always dismount off the back, never the front, so the board can’t roll into your ankles.
Yes, hoverboards are safe for beginners as long as you choose a UL2272-certified board and wear proper gear. That certification means the battery and wiring passed strict fire and electrical testing. Add a helmet and wrist guards, learn in a flat open space, and go slow, and the risk of anything worse than a small tumble stays very low.
Most riders feel steady after just one or two short practice sessions. You’ll likely stand and roll on day one, turn smoothly within a few days, and feel fully confident inside a week of casual practice. Short, frequent sessions beat one long, tiring one. The early wobbles fade fast once your body learns to trust the board.
Adults can absolutely ride hoverboards. Just check the weight limit before you buy, since many boards hold up to about 220 pounds. Adults sometimes take a few extra minutes to learn because they overthink it and look down, but once you keep your eyes up and your moves gentle, it clicks. Bigger 8.5-inch wheel models give taller or heavier riders a more stable, comfortable ride.
Final Checklist ✅
- ✅ Charge the battery fully, then unplug the board.
- ✅ Put on a helmet, wrist guards, and knee and elbow pads.
- ✅ Pick a flat, smooth, open space with no obstacles.
- ✅ Power on and let the board self-level on level ground.
- ✅ Step on one foot at a time, using a wall or a friend for support.
- ✅ Stand tall, look forward, bend your knees, and lean gently to move.
- ✅ Come to a full stop, then step off backward before powering down.