How to Build a Hoverboard: A Step-by-Step Guide for Makers
A friendly, plain-English DIY walkthrough — frame, motors, control board, battery, and safety — written so a hobbyist can actually finish the build, not just admire the photos.
To build a hoverboard, mount two 6.5-inch hub motors to a pivoting two-piece frame, wire them to a hoverboard mainboard with two gyro sensors, power it from a UL-certified 36V Li-ion battery pack with a BMS, then calibrate the gyros on a flat surface before your first careful test ride.
🎯 Key Takeaways
- Total build time: 15–25 hours for a first-timer, $250–$450 in parts.
- The risky part is the battery — always use a pre-built UL-listed pack with a BMS, never loose 18650 cells.
- Two motors + two gyros + one mainboard is the heart of every self-balancing build.
- Open-source firmware (the “hoverboard hack” firmware) lets you tune speed, torque, and lights.
- DIY boards can’t be UL 2272 certified, so good battery choice and fusing matter even more.
📚 Table of Contents
- What a Hoverboard Actually Is (in plain English)
- Before You Start: Skills, Tools & Costs
- The Full Parts List (with a comparison table)
- Step-by-Step: How to Build a Hoverboard
- DIY vs Buying: Cost & Effort Compared
- Battery Safety & Why UL 2272 Matters
- Common Mistakes (and How to Fix Them)
- Pro Tips from Experienced Builders
- Real-World Builds That Inspire
- Myths vs Facts About DIY Hoverboards
- Related Topics on HoverboardsGuide
- Frequently Asked Questions
- Final Build Checklist
So you want to build a hoverboard. Maybe a YouTube video lit up the idea. Maybe your kid’s store-bought board died and you’d rather rebuild it than throw it out. Or maybe you just like making stuff that moves. Whatever brought you here — welcome. This guide walks you through the whole project, from the parts you’ll need to your first wobbly test ride.
Gotrax Hoverboard — Ready to Ride Today
Building a hoverboard from scratch is risky. This UL2272-certified Gotrax is safer, cheaper, and ships in 2 days.
187 Killer Pads Wrist Guards
Whether building or riding, falls happen. Extra-thick splints protect where it matters most.
80SIX Triple-Certified Multisport Helmet
Complete your safety kit. Triple-certified for hoverboard, cycling and skateboarding.
A hoverboard isn’t magic. Underneath, it’s two electric wheels, a couple of tilt sensors, a small computer, and a battery — all bolted to a frame that pivots in the middle. Once you see the parts laid out on a table, the mystery falls away. The tricky bits are the battery (which can be dangerous if you cut corners) and the calibration (which can be fussy). We’ll handle both.
By the end of this guide, you’ll know exactly what to buy, how to put it together, what tends to go wrong, and how to ride your finished board safely. Let’s get into it. 🛠️
What a Hoverboard Actually Is (in plain English)
A hoverboard — the toy kind, not the floating sci-fi kind — is a self-balancing electric scooter with two wheels, no handlebar, and a foot platform that you stand on. It uses tilt sensors to figure out which way you’re leaning, then spins the wheels to keep you upright. Lean forward, you go forward. Lean back, you stop. Twist your feet, you turn.
Underneath the plastic shell, every hoverboard has the same six building blocks:
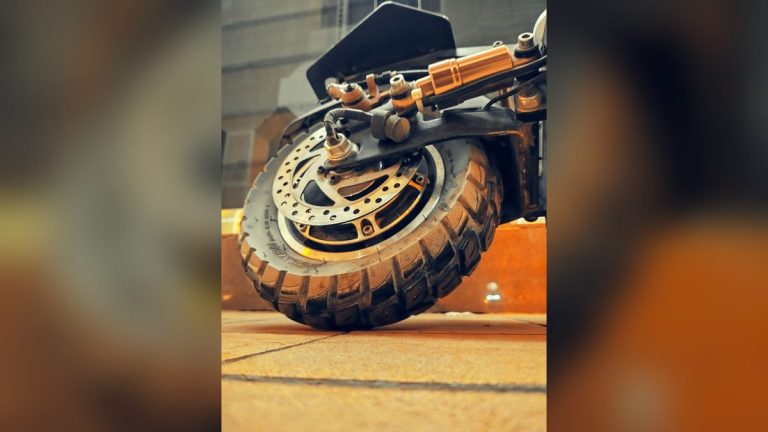
- Two hub motor wheels — the motor is built right into the wheel, so each wheel drives itself.
- A frame that’s split in two halves connected by a pivot bearing. That center pivot is what lets each foot tilt independently for steering.
- A mainboard (control board) — a small circuit board with a microcontroller that reads the sensors and tells the motors what to do.
- Two gyro/sensor boards — one under each foot, with an MPU-6050 chip and a foot pad sensor or optical switch.
- A lithium-ion battery pack — usually 36V, with a built-in Battery Management System (BMS).
- A charger matched to the battery’s voltage and chemistry.
“If you can wire a doorbell and follow a wiring diagram, you can wire a hoverboard. The physics is doing the hard part — you’re mostly putting screws in the right holes.” — Marcus, after his second build went smoother than his first
The clever part is the software. A control loop called a PID controller runs hundreds of times per second, comparing your tilt angle to “level” and nudging the motors to close the gap. You feel that as smooth balance. The hardware is mostly just bolts, wires, and sensors.
Once you understand that mental model — two wheels, two sensors, one brain, one battery — the rest of this guide is just plumbing.
Before You Start: Skills, Tools & Costs
Let’s set expectations. A first hoverboard build is a weekend project for a confident hobbyist, not a 30-minute Lego set. Here’s what you should be comfortable with before you order parts.
Skills you’ll want
- Basic soldering — clean joints on 12–14 gauge wire.
- Reading a wiring diagram and matching colored wires to a connector.
- Using a multimeter to check voltage and continuity.
- Patience for calibration. Half of all “broken” DIY boards just need a recalibration on a flat floor.
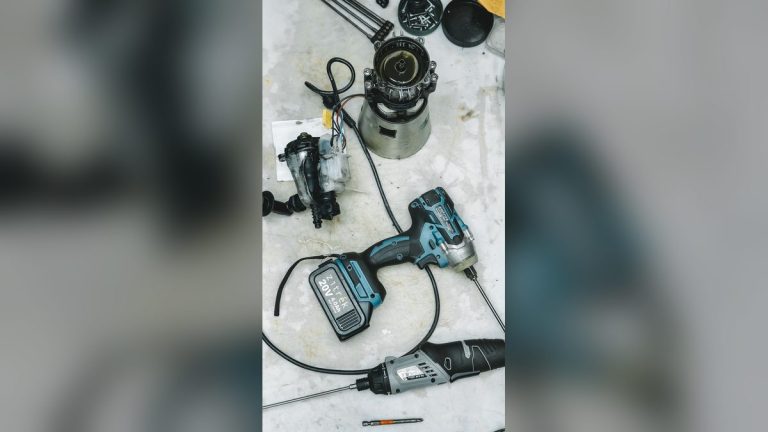
Tools you’ll need
- Soldering iron + lead-free solder
- Wire strippers and crimping pliers
- Multimeter
- Allen key set (M3–M8)
- Heat shrink tubing and a small heat gun (or a lighter, carefully)
- A laptop with the Arduino IDE if you plan to flash custom firmware
Realistic budget
A working DIY hoverboard runs roughly $250–$450 in parts if you buy new. You can drop that to $120–$180 if you harvest motors and a frame from a dead retail board (a popular and very reasonable approach). Tools are extra, but if you’re already a tinkerer, you probably own most of them.
The Full Parts List
Here’s a clean shopping list with realistic 2026 prices. Don’t panic at the long list — most of these parts come bundled in DIY hoverboard kits, which is the easiest way to start.
If you’d rather hunt parts individually or grab a complete hoverboard motor wheel kit, you can see options on Amazon #ad — search results vary by season, but the listings usually include the most common 6.5-inch motor sizes used in DIY builds.
Step-by-Step: How to Build a Hoverboard
Once your parts are on the bench, the build itself goes fast. Here are the six steps in order. Take your time on Step 4 (wiring) and Step 5 (battery) — that’s where every mistake is made.
1Build the Frame
If you bought a kit, the frame is already cut. If not, you’re making two mirror-image steel or aluminum halves connected by a center pivot bearing. The pivot is what makes a hoverboard a hoverboard — without it, the two halves can’t tilt independently and you can’t steer.
Bolt the pivot bearing in the middle, and dry-fit each half so it rotates smoothly without play. A wobbly pivot makes a wobbly ride.
2Mount the Hub Motor Wheels
Each hub motor bolts to the outer end of one frame half using four M8 bolts. The motor cable should exit through a hole in the frame so it’s protected from scrapes. Tighten in a star pattern so the motor sits flat. If it wobbles, your bolts aren’t even.
Route both motor cables toward the center, where they’ll meet the mainboard. Don’t trim them yet — you’ll want extra slack while wiring.
3Mount the Mainboard and Sensor Boards
The mainboard goes in the center, between the two halves, on a small platform or standoffs. Each gyro sensor board mounts directly under one foot pad, in line with the motor on its side. Orientation matters: every gyro board has an arrow or “front” mark — point it the same way the rider faces.
Use rubber standoffs if you have them. They damp out vibration that can give the gyros false readings.
4Wire Everything Together
This is the step where most first builds go wrong, so go slow. Most kits use color-coded JST connectors that only fit the right way — don’t force them. Plug the motors into the dual three-phase ports on the mainboard. Plug each gyro/sensor board into its matching JST socket. Connect the foot pad switches.
Leave the battery pack disconnected for now. Double-check every connection against the kit’s wiring diagram. Then check it again. Reverse a phase wire and you’ll get a motor that spins backward — annoying but fixable. Reverse a battery polarity and you’ll fry the board in a flash.
Inline a 30A fuse on the battery’s positive lead. This single $2 part has saved many builds.
5Install the Battery Pack (Carefully)
Use a pre-built, UL-listed 36V battery pack with an integrated BMS. The BMS protects against overcharge, overdischarge, and short circuit — it’s the layer that keeps your project from turning into a news story. Don’t try to assemble loose 18650 cells unless you have spot-welding gear and real battery experience.
Mount the pack inside the frame’s protected enclosure, ideally with foam padding around it so it can’t shift. Secure the cables so nothing can rub through the insulation over time.
Connect the battery last, after every other connection is verified with a multimeter. Power on. If anything smells, smokes, or gets hot, disconnect immediately.
6Calibrate, Then Test
Place the finished board on a perfectly flat floor. Most kits calibrate by holding the power button until the LEDs flash a specific pattern (check your kit’s manual). The board has to be still and level during calibration — even a slight tilt will leave it forever convinced “level” is crooked.
Helmet, knee pads, and wrist guards on. Step on with one foot first, then the other, in a wide open space. Lean gently. Your first 30 seconds will feel weird; that’s normal.
If a wheel spins the wrong way, swap any two of its three motor phase wires and recalibrate. If the board fights you on one side, your gyro is mounted backwards or in the wrong slot — don’t ride it, just fix it.
DIY vs Buying: Cost & Effort Compared
Be honest with yourself before committing a weekend. For most riders, buying a UL-certified board is faster, cheaper, and safer. You build a hoverboard for the project, not the savings. Here’s how the two paths actually compare:
If you mainly want a board to ride to the park, just buy one. If you want a project that teaches you electronics, motors, control loops, and battery safety in one weekend — build one. Both answers are valid.
Battery Safety & Why UL 2272 Matters
In 2016 the U.S. Consumer Product Safety Commission recalled hundreds of thousands of hoverboards because of fires caused by poorly made battery packs. The lesson stuck. UL Solutions created the UL 2272 standard specifically to test the entire electrical drive system of self-balancing scooters — battery, charger, motor controller, and the way they interact under fault conditions.
A DIY hoverboard cannot be UL 2272 certified, because certification applies to a finished product tested in a UL lab. But you can take the principles UL tests for and apply them at home:
- Use a pre-built battery pack from a reputable seller, ideally one that lists UL component recognition. Avoid generic eBay packs of unknown origin.
- Always include a BMS. The Battery Management System balances cells, cuts power on overcurrent, and stops charging at the right voltage. No BMS, no ride.
- Use the matching charger. Voltage and chemistry must match exactly. A 42V charger on a 36V Li-ion pack is correct (Li-ion charges to ~4.2V/cell × 10 cells). A “universal” charger from your drawer is a fire waiting to happen.
- Inline-fuse the battery. A simple 30A automotive blade fuse on the positive lead protects the entire system.
- Charge in a safe spot. Concrete or tile floor, away from curtains, never overnight while you sleep — at least for the first dozen charge cycles.
Common Mistakes (and How to Fix Them)
Almost every first-time builder hits two or three of these. Knowing them in advance saves hours.
❌ Mistake 1: Calibrating on a tilted floor
Fix: Use a small spirit level on the foot pads before you hit calibrate. If the floor is even slightly off, the board will think “level” is wrong forever and will pull to one side.
❌ Mistake 2: Mixing motor phase wires
Fix: If a motor spins the wrong way, swap any two of its three phase wires (the thick yellow/blue/green ones). Don’t touch the small Hall-sensor cable — that’s a different fix and rarely needed.
❌ Mistake 3: Reversing battery polarity
Fix: Honestly, prevention only. Mark + and − on every cable with red and black tape, and check polarity with a multimeter before the connector goes in. Reverse polarity usually kills the mainboard instantly.
❌ Mistake 4: Loose pivot bolt
Fix: A pivot bearing that wobbles makes the board feel possessed. Use a thread-locker (blue Loctite) when you assemble the pivot, and re-check torque after the first hour of riding.
❌ Mistake 5: Skipping the test bench
Fix: Power up your board on a workbench with the wheels off the ground first. Lean each foot pad by hand and watch the wheels spin in the right direction. It’s a 60-second sanity check that prevents 60-minute injuries.
Pro Tips from Experienced Builders
After three full builds and a lot of hours on hoverboard forums, here’s what separates a board that just works from one that feels great:
- 💡 Flash open-source firmware. The community-built “hoverboard hack” firmware (search GitHub for the EmanuelFeru repo) lets you tune motor torque, raise speed limits cautiously, add Bluetooth audio, and read battery voltage. It works on most generic mainboards and turns your build into a real platform.
- 💡 Add a power switch. Many kits leave the battery hot-wired to the mainboard. A real key switch or rocker switch on the positive lead means you can park it for weeks without phantom drain.
- 💡 Use silicone-jacketed wire. PVC wire stiffens in cold weather. Silicone stays flexible and survives flex cycles around the pivot for years.
- 💡 Heat-shrink everything. Every solder joint, every spade terminal. It’s tedious. Do it anyway. Vibration finds the one joint you skipped.
- 💡 Take photos at every step. When something stops working three months later, your build photos are the wiring diagram you actually need.
Real-World Builds That Inspire
If you want proof that this is doable, the maker community is loud and proud. A few patterns we keep seeing in YouTube uploads, Reddit’s r/hoverboard, and Hackaday posts:
- The “dead board rebuild.” A teenager finds a broken hoverboard at a thrift store for $15, swaps the mainboard and battery for $90 in fresh parts, and ends up with a custom-painted board for a fraction of retail. This is the most common first build, and it’s where we’d start.
- The “bigger wheels” mod. Builders in the off-road community swap the stock 6.5-inch motors for 8.5- or 10-inch versions with chunky tires, then strengthen the frame to handle dirt and grass. Top speeds drop a little, but the ride gets dramatically smoother.
- The “robot platform.” Engineering students hack hoverboard parts into balancing robots, mobile camera rigs, and even small autonomous delivery bots. The core electronics are cheap, sturdy, and everywhere.
- The “hoverkart conversion.” Makers attach a frame and seat to a hoverboard to turn it into a go-kart. The hoverboard’s wheels and battery do all the work; the frame just sits on top.
“My first build was a Frankenboard from two broken hoverboards. It looked terrible and rode like a dream. I learned more in that weekend than in a semester of EE class.” — Forum post on a popular maker community, paraphrased
Myths vs Facts About DIY Hoverboards
❌ Myth: Building a hoverboard is way cheaper than buying one.
Fact: Usually it’s slightly more expensive once you count tools and shipping. The win is learning, not money.
❌ Myth: All lithium batteries are equally dangerous.
Fact: A reputable, BMS-protected pack from a known brand is dramatically safer than a no-name pack of the same voltage. Cell quality and BMS quality are everything.
❌ Myth: You need to write the balancing code yourself.
Fact: The mainboard already runs the PID balancing loop. You only need code if you want to flash custom firmware for extra features.
❌ Myth: Bigger wheels = faster board.
Fact: Bigger wheels actually lower top speed (more torque, less RPM) but give a much smoother ride over rough surfaces. Speed comes from voltage and motor wattage, not diameter.
❌ Myth: A homemade board can be UL 2272 certified.
Fact: No. UL 2272 applies to finished products tested by UL Solutions. You can use UL-listed components, but the assembled board itself can’t be certified.
Related Topics on HoverboardsGuide
- How Do Hoverboards Work? — A deeper explainer on the gyroscopes, accelerometers, and PID controllers that keep you upright.
- UL 2272 Explained — What the certification actually tests and how to verify a board really has it.
- Hoverboard Battery Care Guide — How to maximize the lifespan of your Li-ion pack.
- Best Hoverboards in 2026 — If a DIY build isn’t your thing, our buyer’s guide compares the top retail options.
- Hoverboard Troubleshooting Guide — Diagnose flashing lights, beeping sounds, and balancing issues.
Frequently Asked Questions
Is it cheaper to build a hoverboard than buy one?
Usually no. A solid DIY build costs $250–$450 in parts, while a UL 2272 certified retail board often sells for $150–$250. You build for the learning, the customization, and the repairability — not for the savings.
What parts do I need to build a hoverboard?
Two 6.5- to 10-inch hub motor wheels, a hoverboard mainboard, two gyro sensor boards, foot pads or pressure switches, a 36V Li-ion battery pack with a BMS, a matching charger, a frame with a pivoting center, and basic wiring and fasteners.
Is building a hoverboard dangerous?
It can be if you cut corners. The biggest risk is the lithium-ion battery, which can ignite if it’s poorly built or short-circuited. Use a UL-listed pre-built pack with a BMS, fuse the battery, and never assemble loose 18650 cells unless you have real battery experience.
How long does it take to build a hoverboard?
A first-time builder usually needs 15–25 hours spread across a weekend or two. That covers ordering parts, assembling the frame, wiring everything, calibrating, and testing. Experienced builders can finish in under 8 hours.
Can I program my own hoverboard mainboard?
Yes. Many DIY builders flash open-source firmware (the “hoverboard hack” firmware) onto a generic mainboard using an ST-Link programmer. This unlocks features like custom speed limits, LED control, and Bluetooth audio.
Do home-built hoverboards meet UL 2272 safety standards?
No. UL 2272 certification applies to a finished product tested in a UL lab. A DIY board can’t be certified, but you can sharply reduce risk by using UL-listed battery packs and chargers, a quality BMS, and proper inline fusing.
Final Build Checklist
Before your first ride, walk through every line:
- ✅ Frame pivots smoothly with no play
- ✅ Both motor wheels bolted in a star pattern, no wobble
- ✅ Mainboard mounted with rubber standoffs
- ✅ Gyro sensor boards oriented the same way as the rider
- ✅ Wiring matches the kit’s diagram (verified twice)
- ✅ Inline 30A fuse on the battery’s positive lead
- ✅ Battery pack is UL-listed with a working BMS
- ✅ Charger voltage matches battery voltage exactly
- ✅ Bench-tested with wheels in the air, both spinning the right direction
- ✅ Calibrated on a flat, level floor
- ✅ Helmet, knee pads, and wrist guards on for the first ride
- ✅ Test ride in an open, padded space — not the kitchen
📖 Further Reading
- CPSC — Hoverboard Safety Information (official U.S. government safety page)
- UL Solutions — UL 2272 Certification Overview
- HoverboardsGuide — How Hoverboards Work
- HoverboardsGuide — Best Hoverboards 2026
Last updated: May 2026 · Author: Marcus Reid, Senior Editor
This guide is educational. It is not a substitute for licensed electrical training. Building lithium-ion-powered devices carries real risk of fire and injury — proceed at your own discretion, follow all local laws, and use protective equipment. HoverboardsGuide is reader-supported; some links on the site are affiliate links, marked clearly where they appear.