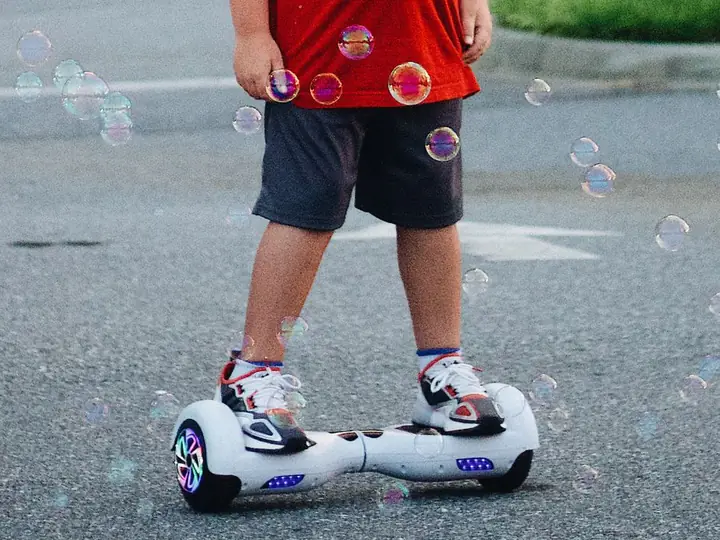
Worn-out wheels? Cracked rubber? Weird wobble? Here’s the simple way to swap your hoverboard tires at home — even if you’ve never opened one up before.
To replace hoverboard tires, power off and unplug the device, remove the bottom shell screws, disconnect the motor wires, slide the wheel off the axle, pry the old tire off the hub, stretch the new tire on, then reassemble. Most riders finish in 30–60 minutes with basic tools.
Key Takeaways
- Most hoverboards use 6.5-inch solid rubber tires — they don’t go flat, but they do wear down and crack over time.
- Off-road hoverboards use 8.5 or 10-inch pneumatic tires — these can be patched or replaced like bike tires.
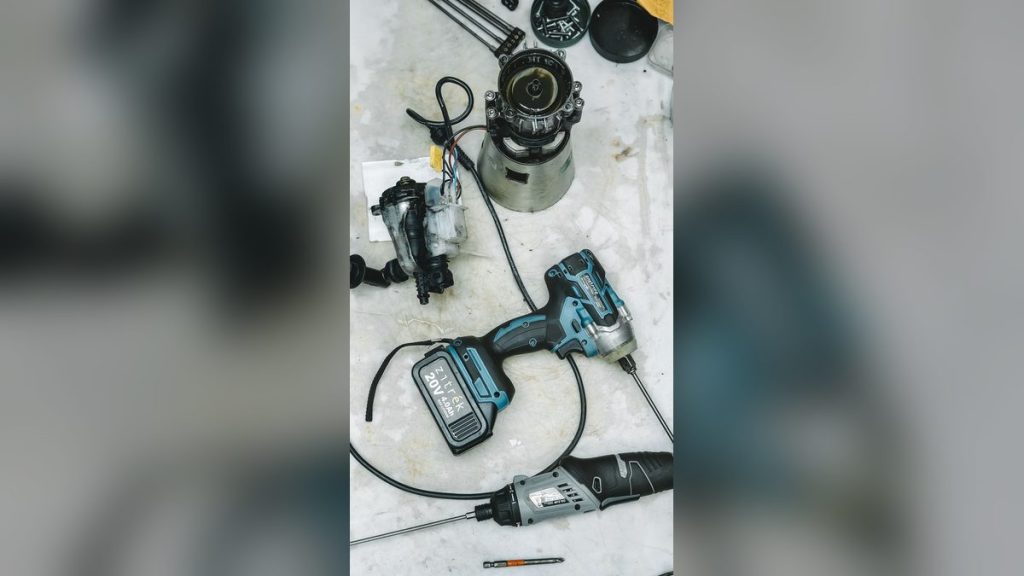
- You’ll need a Phillips screwdriver, a 17mm or 19mm wrench, and a tire iron — that’s it for most jobs.
- Always disconnect the motor wires gently before pulling the wheel out, or you’ll snap connectors.
- Sometimes it’s smarter to replace the whole wheel-and-motor assembly — easier, faster, and only $10–$30 more.
- Test at low speed on a flat surface before riding hard, just in case anything is loose.
If your hoverboard feels bumpier than usual, makes a clicking sound, or you can see the rubber peeling off the wheel, you don’t need to throw the whole thing away. Learning how to replace hoverboard tires is one of the cheapest and most satisfying fixes you can do — and it usually takes less than an hour.
Hover-1 My First — A New Kids’ Board
When an old kids’ board needs new tires and more, a new board can be the simpler fix. The Hover-1 My First is UL 2272 certified and tops out at 5 mph, for riders up to 80 lb.
80SIX Triple-Certified Multisport Helmet
While your board is being repaired, plan your safety kit. Triple-certified for all riding.
Hoverboard Carrier Backpack
Transport your hoverboard to the repair shop hands-free. Fits all 6.5″–10″ boards.
Repair shops can quote $80 or more for a job that costs maybe $20 in parts at home. The truth is, the inside of a hoverboard is a lot less scary than it looks. There are really only a few screws between you and a fresh set of tires.
In this guide, I’ll walk you through the whole process in plain English — no jargon, no skipped steps. We’ll cover when to replace your tires, what tools you actually need, the right way to swap both solid and pneumatic tires, the mistakes that trip up first-timers, and how to know if you should just replace the whole wheel instead. By the end, you’ll have a smoother, safer ride and a small win you did with your own hands.
Table of Contents
- Why You Might Need to Replace Hoverboard Tires
- Signs Your Hoverboard Tires Are Done
- Types of Hoverboard Tires (Know Yours First)
- Tools and Parts You’ll Need
- Step-by-Step: Replacing a Solid Rubber Tire
- Replacing a Pneumatic (Off-Road) Tire
- Common Mistakes (and How to Fix Them)
- Pro Tips From the Workshop
- Tire Only vs Full Wheel Replacement
- Frequently Asked Questions
- Final Replacement Checklist
This article is part of our hoverboard troubleshooting hub, which covers every common fault, from charging to calibration.
Why You Might Need to Replace Hoverboard Tires
Hoverboard tires take a serious beating. Every time you ride, the rubber rolls under your full body weight, twists when you turn, and grinds against pavement, sidewalk cracks, and bits of grit. Over hundreds of miles, that adds up. The tread wears smooth, the rubber dries out, and small chunks can flake off the edges. Even hoverboards that mostly sit in a closet aren’t safe — rubber loves humidity and hates UV light, so storage matters too.
Replacing your tires isn’t just about looks. Worn rubber means less grip, which makes the board harder to control on damp ground or polished floors. It also means less cushioning, so every tiny pebble feels like a speed bump. And if a tire actually splits or peels off the hub mid-ride, you can be thrown off — that’s an avoidable injury.
There’s also a cost angle worth thinking about. A decent set of replacement hoverboard tires is usually $15–$40, while a brand-new hoverboard starts at $120 and climbs fast. If your battery and motors are still healthy, swapping tires gives you another year or two of riding for the price of a pizza dinner.

Signs Your Hoverboard Tires Are Done
Most riders ignore tire wear until the board starts behaving weirdly. Don’t be that rider. The earlier you spot the warning signs, the easier and cheaper the fix is. Here’s what to watch for, and what each clue actually means.
Visible cracks or cuts in the rubber
Look at your tires under good light. Tiny surface cracks, sometimes called “weather cracking,” show the rubber is drying out. Small ones are fine for a while. Deep cuts or chunks missing from the edge are not — that tire is on borrowed time.
A wobbly or shaky ride
If your hoverboard suddenly feels unstable on smooth ground, it might not be the gyroscope — it might be uneven tire wear. Spin each wheel by hand and watch the outer edge. A wobble or visible up-and-down bounce means the rubber isn’t sitting flat on the hub anymore.
Loss of grip on smooth or wet surfaces
Hoverboards aren’t great in the rain to begin with, but if you start sliding on tile floors, painted concrete, or slightly damp pavement, your tread is too smooth. New tires have a lightly textured surface; old tires polish to a near-mirror finish.
A clicking, knocking, or rubbing sound
Sound is the easiest diagnostic. A rhythmic click usually means a piece of rubber has come loose and is hitting the housing. A constant rubbing noise often means the tire has shifted on the hub. Either way, open it up and look.
Types of Hoverboard Tires (Know Yours First)
Before you order new tires, you have to know exactly what’s on your board. Buying the wrong size is the number-one rookie mistake. Hoverboard tires come in three main flavors, and they don’t mix.
6.5-inch solid rubber tires
This is the classic kid-and-teen hoverboard size. Solid rubber means no air, no flats, ever. The trade-off is a slightly bumpier ride and harder replacement, since you have to physically stretch the rubber over the metal hub. Most major brands like Hover-1, Jetson, and Gotrax use this size on their entry-level boards. You can view 6.5-inch replacement options on Amazon to see what fits your model.
8 and 8.5-inch tires (solid or pneumatic)
Mid-size hoverboards aimed at adults and commuters. Some are solid rubber, some are pneumatic (air-filled). Pneumatics roll better over cracks and gravel but can puncture. If you have an 8.5-inch board with a tire valve stem sticking out, you’ve got pneumatics. Check 8.5-inch hoverboard tires on Amazon if that’s what you’re running.
10-inch off-road pneumatic tires
All-terrain hoverboards (think rugged tread, big knobby look) almost always use 10-inch pneumatic tires. They handle grass, dirt, and gravel beautifully but need air checks every couple of weeks. Replacement is more like changing a small bike tire — you remove the inner tube as well.
| Tire Type | Best For | Pros | Cons |
|---|---|---|---|
| 6.5″ Solid Rubber | Kids, beginners, indoor riding | Never goes flat, cheap | Bumpier ride, harder to install |
| 8/8.5″ Solid Rubber | Teen and adult commuters | Smoother than 6.5″, still flat-proof | Heavier, costlier than small solids |
| 8.5″ Pneumatic | Light off-road and sidewalks | Comfortable, better grip | Can puncture, needs air checks |
| 10″ Off-Road Pneumatic | Grass, dirt, gravel, trails | Handles rough ground easily | Heaviest, more replacement parts |
Tools and Parts You’ll Need
You don’t need a full mechanic’s setup for this. Most home toolboxes already have everything. Here’s the short list, with notes on what works best.
- Phillips screwdriver (PH2 size): For the bottom shell screws. Magnetic tip is a nice touch — those screws love to roll under the workbench.
- 17mm or 19mm wrench (or socket set): For the axle nut holding the wheel on. Most 6.5-inch boards use 17mm; bigger boards often use 19mm.
- Tire iron, plastic pry bar, or sturdy flathead screwdriver: For levering the old tire off the hub. Plastic pry bars are gentler on the hub paint.
- Rubber mallet (optional but helpful): Tapping a stubborn tire onto the hub is much easier with a rubber mallet than your palm.
- Soapy water in a spray bottle: Lubricates the rubber so it slides over the hub. Old plumber’s trick.
- The new tire (correct size!): Order in pairs even if only one looks worn. Mismatched tires can cause balance issues.
Step-by-Step: Replacing a Solid Rubber Tire
This is the full walk-through for the most common kind of hoverboard tire — the 6.5 or 8-inch solid rubber type. Read all the steps before you start so you know what’s coming. Take it slow on your first try.
Step 1: Power down everything
Turn the hoverboard off. Unplug the charger. Wait at least 2–3 minutes so the internal capacitors discharge. This matters — touching the wrong contact while the system is live can fry the motherboard.
Step 2: Flip it over and remove the bottom shell
Place the board upside down on a soft surface. Find every screw on the bottom plastic plate — usually 8 to 12 of them, often hidden under rubber feet or stickers. Remove them all and put them in a small bowl or magnetic tray. Lift the bottom shell off slowly. There may be a wire or two attached to it; just unplug them gently.
Step 3: Identify the motor wire harness
You’ll see two motherboards (one near each wheel) and a thick bundle of colored wires running from each motor into a plug. Take a picture with your phone before you touch anything. That photo is gold when it’s time to put it back together.
Step 4: Disconnect the motor wires
Squeeze the plastic locking tab on the wire harness and pull the connector straight out. Don’t yank on the wires — yank on the connector. Set the wires aside.
Step 5: Remove the wheel from the frame
Use your wrench to loosen the axle nut on the outside of the wheel. It might be tight — that’s normal. Once it’s off, the entire wheel-and-motor assembly slides out of the frame. Keep the metal washers and any spacers safe.
Step 6: Pry off the old tire
Here’s the part that takes patience. Spray some soapy water around the tire-hub joint. Slide the tire iron between the rubber and the metal hub, lever a small section up, then work your way around the wheel pulling more rubber free. Keep going until one side of the tire pops off. Then peel the whole tire off the hub.
Step 7: Install the new tire
Spray the inside of the new tire with soapy water. Stretch one edge over the hub first, then work around with your thumbs (or the pry bar) to seat the second edge. A rubber mallet helps tap the rubber down evenly. Make sure the tire is sitting flush all the way around — no gaps between rubber and metal.
Step 8: Reassemble in reverse
Slide the wheel back into the frame, put the washers back in the right order, tighten the axle nut. Reconnect the motor wire harness (using your phone photo as a guide). Replace the bottom shell, screw it back together, and stand the board upright.
Step 9: Test on flat ground
Power on, listen for any new noises, and ride very slowly across a flat indoor space. If it pulls to one side, double-check that the motor wires are fully clicked in. If it feels great, congratulations — you just saved yourself a repair shop trip.
The biggest mental hurdle is opening the shell. Once you see how simple the inside is, the rest of the job feels obvious.
Replacing a Pneumatic (Off-Road) Tire
If you ride an off-road or all-terrain hoverboard with 8.5 or 10-inch air-filled tires, the process is a bit different — and honestly, easier in most ways. You’re basically dealing with a small bike tire setup.
The first five steps are the same: power down, remove the bottom shell, photograph the wires, disconnect the motor harness, and slide the wheel out. After that, the work shifts to the rim itself.
- Deflate the tire fully. Press the valve stem core until you hear all the air escape. A flat tire is much easier to remove than a partially inflated one.
- Unscrew the rim halves. Off-road hoverboard wheels are usually split rims held together by 4–6 small bolts. Remove these bolts, separate the two halves of the rim, and pull out the inner tube and tire.
- Inspect the inner tube. If it’s a slow leak, you can patch it with a standard bike tube patch kit. If it’s torn or dry-rotted, replace it.
- Install the new tire and tube. Place the tube inside the new tire, line up the valve stem with the rim hole, and reassemble the two rim halves around them.
- Tighten the rim bolts in a star pattern. Like changing a car tire — go opposite-to-opposite, not in a circle. This keeps pressure even.
- Inflate to the recommended PSI. Most off-road hoverboard tires want 25–35 PSI. Check the sidewall of the tire for the exact number.
If you’d rather skip the inner-tube wrestling, you can see 10-inch off-road tire and tube options on Amazon. Buying tire and tube together as a kit usually saves money and headaches.
Common Mistakes (and How to Fix Them)
First-timers tend to go wrong in the same few places. Here are the top traps and how to dodge them.
Mistake 1: Buying the wrong tire size
The fix: Always check the side of your existing tire and measure the diameter before ordering. A 6.5-inch tire will not stretch onto an 8-inch hub. Returns are a hassle.
Mistake 2: Yanking the motor wires
The fix: Pull the connector, never the wire itself. If the connector won’t release, look for a small plastic tab on the side and press it before pulling.
Mistake 3: Mixing up the left and right motor harness
The fix: Take photos. If you do swap them by accident, the board will spin in circles or refuse to balance. Just open it back up and switch them.
Mistake 4: Forgetting the washers
The fix: When you slide the wheel out, lay the washers and spacers down in the exact order they came off. They control the wheel’s alignment in the frame, and missing one means a wobble.
Mistake 5: Overtightening the axle nut
The fix: Snug, not Hulk-grip. Overtightening can damage the bearing and make the wheel hard to spin freely. If you can’t turn the wheel by hand after tightening, back the nut off a quarter turn.
Mistake 6: Skipping the test ride
The fix: Always test in a safe, open space at low speed. If anything feels off — pulling, vibrating, clicking — stop and recheck before you ride down the street.
Pro Tips From the Workshop
A few small habits separate frustrating tire jobs from smooth ones. These are the tricks most first-timers wish they had known.
- 💡 Replace tires in pairs. Even if only one looks bad, the other isn’t far behind. Matching tires also keep the board balanced and the ride consistent.
- 💡 Warm rubber stretches better. If you’re working in a cold garage, leave the new tires somewhere warm (not hot) for an hour first. Cold rubber fights you.
- 💡 Use dish soap, not WD-40. WD-40 can degrade rubber over time. A drop of dish soap in water is the right slick — and it dries away to nothing.
- 💡 Save your old tires for practice. Once you’ve removed an old tire, try putting it back on. Two minutes of practice on something you don’t care about pays off when the new tire is in your hands.
- 💡 Don’t lose track of orientation. Tires often have a directional tread. Look for an arrow on the sidewall and install the tire so it points in the rolling direction.
- 💡 Keep a small parts bag in your tool drawer. Spare screws, an extra wire connector, and a fresh axle nut cost almost nothing online and save the day when something gets stripped or lost.

Tire Only vs Full Wheel Replacement
Here’s a question that comes up a lot: should you just replace the rubber tire, or swap out the whole wheel-and-motor assembly? The answer depends on what’s actually wrong, your budget, and how comfortable you are with prying rubber.
A tire-only swap is cheaper but more physical. A full wheel assembly costs more but takes maybe 15 minutes total — you’re really just disconnecting one wire and unbolting one nut, then doing the reverse. Here’s how the two stack up side by side.
| Factor | Tire Only | Full Wheel Assembly |
|---|---|---|
| Typical cost (pair) | $15–$40 | $40–$80 |
| Time required | 45–75 minutes | 15–30 minutes |
| Tools needed | Screwdriver, wrench, pry bar | Screwdriver, wrench only |
| Skill level | Beginner-friendly with patience | Very beginner-friendly |
| Best when | Motor is healthy, only rubber is worn | Motor is noisy or weak too |
| Long-term value | Great if motor still has life | Resets the wheel completely |
My honest take: if your motor sounds healthy and only the rubber looks bad, just do the tire. If the wheel feels gritty when you spin it by hand, or the motor whines, do the whole assembly and don’t look back. You can see full wheel and motor options on Amazon if that’s the route that fits your situation.
Related Topics Worth Knowing
Tires are one piece of the maintenance puzzle. If you’re already opening up the shell, it’s worth checking in on these other common issues:
- Hoverboard battery health: Batteries fade after 300–500 charge cycles. Read our hoverboard battery replacement guide for signs and steps.
- Calibration after repairs: Most boards need a quick recalibration after you reconnect the motors. See our calibration walkthrough.
- UL 2272 certification: If you’re buying replacement parts or a new board, only stick with UL 2272 certified models for fire safety. The U.S. Consumer Product Safety Commission has been clear about this.
- Off-road vs sidewalk hoverboards: Wheel size changes everything about ride feel. Compare off-road hoverboard options here if you’re thinking of upgrading.
- UL Solutions standards: If you want to dig into the actual safety standard, UL Solutions explains UL 2272 certification in plain English.
Frequently Asked Questions
Can you replace hoverboard tires yourself?
Yes. With a Phillips screwdriver, a wrench, and a bit of patience, most riders can replace hoverboard tires at home in 30 to 60 minutes. Solid rubber tires are harder to swap than pneumatic ones, but both are doable without a mechanic.
How much does it cost to replace hoverboard tires?
A pair of replacement tires usually costs $15 to $40 depending on size and type. A full wheel-and-motor assembly runs $30 to $80. Doing the swap yourself saves the $40 to $90 a repair shop would charge in labor.
What size tire does my hoverboard use?
Most hoverboards use 6.5-inch tires. Larger commuter models use 8 or 8.5-inch tires, and off-road hoverboards use 10-inch pneumatic tires. Check the side of your existing tire or your owner’s manual for the exact size.
Are hoverboard tires solid or pneumatic?
Standard 6.5 and 8-inch hoverboards use solid rubber tires that never go flat. Off-road models with 8.5 or 10-inch wheels use pneumatic (air-filled) tires that grip rough ground but can puncture.
How long do hoverboard tires last?
Solid rubber tires last 500 to 1,500 miles depending on rider weight, terrain, and storage conditions. Pneumatic tires can last longer in tread life but may need more frequent air top-ups or patches.
Should I replace just the tire or the whole wheel?
If only the rubber is worn and the motor still spins quietly, replace just the tire. If the motor is noisy, sluggish, or the bearings feel rough, swap the entire wheel-and-motor assembly. Full assemblies are easier to install but cost more.
Final Replacement Checklist
Print this list or screenshot it before you start. Tick each item off as you go.
- ✅ Confirm your tire size (6.5″, 8″, 8.5″, or 10″)
- ✅ Order matching replacement tires (in pairs)
- ✅ Gather Phillips screwdriver, wrench, pry bar, mallet
- ✅ Power off and unplug the hoverboard
- ✅ Photograph wires before disconnecting
- ✅ Keep all screws and washers organized
- ✅ Spray soapy water for easy tire removal
- ✅ Watch for the directional tread arrow on new tires
- ✅ Reconnect motor wires firmly until they click
- ✅ Tighten the axle nut snugly, not super-tight
- ✅ Recalibrate the board (hold power button per manual)
- ✅ Test ride at low speed on flat, open ground
Wrapping It Up
Replacing hoverboard tires sounds intimidating until you actually do it. The internal layout is simple, the tools are basic, and the parts are cheap. The hardest part is the first time you crack open the bottom shell and trust yourself with a screwdriver. After that, it’s mostly muscle memory.
Whether you went with a full tire swap or a complete wheel assembly, you’ve extended the life of your hoverboard by potentially years — and you’ve learned a skill that applies to e-scooters and other personal electric vehicles too. Take the win, ride safely, and check those tires every couple of months for early signs of wear.
Further Reading
- Complete Hoverboard Maintenance Guide — keep your board running for years.
- Best Hoverboards of 2026 — if it’s finally time to upgrade.
- How to Calibrate a Hoverboard — essential after any internal repair.
- CPSC.gov — official U.S. consumer product safety updates.
- UL 2272 Certification Overview — the safety standard for hoverboards.
This article is educational. Always follow your hoverboard manufacturer’s repair guidance and consult a professional for any electrical issue you’re unsure about.