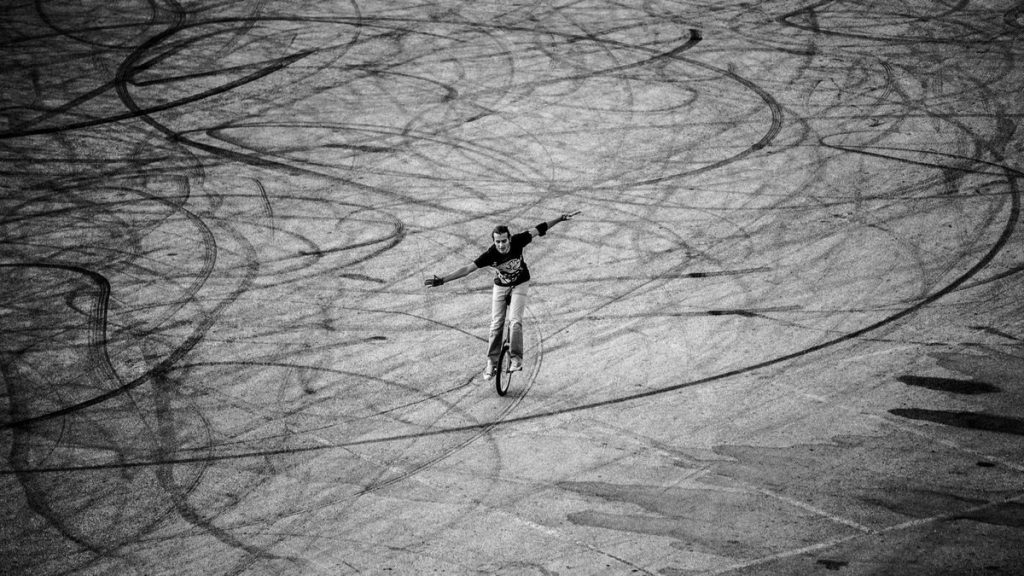
From your very first wobble to your first 100-foot ride — a friendly, no-fluff walkthrough from a coach who has taught hundreds of beginners.
Key Takeaways
- Most adults learn to ride 30+ feet within 10–20 hours of focused practice spread over 2–4 weeks.
- A 20-inch wheel is the easiest size to learn on for teens and adults under six feet tall.
- Lean slightly forward, look ahead, and let the wheel travel under you — not in front of you.
- Always practice next to a wall, fence, or rail for the first 5–10 hours to build muscle memory safely.
- A helmet, wrist guards, and shin pads are non-negotiable — pedal scrapes are the most common injury.
- Short, daily sessions of 20–30 minutes beat long weekend marathons. Your nervous system needs sleep to lock in balance.
So you want to learn how to ride a unicycle for beginners, and honestly? Good for you. It looks impossible from the outside — one wheel, no handlebars, no brakes — but here’s the truth: thousands of regular people learn this every year, including grandparents, busy parents, and folks who never even rode a bike well. If they can do it, you can too.
I have spent the last twelve years coaching unicycle riders at community workshops and summer camps, and I can tell you the people who succeed are not the most athletic. They are the most patient. They show up for short practice sessions, fall a few times, laugh it off, and try again the next day. That’s it. That is the whole secret.
InMotion V5F Electric Unicycle — Self-Balancing
Learning unicycle? The InMotion V5F makes it easier — the motor helps you stay upright.
No longer sold on Amazon
187 Killer Pads Wrist Guards
Unicycle falls are guaranteed when learning. Extra-thick wrist protection is essential.
80SIX Triple-Certified Multisport Helmet
Always wear a helmet while learning to unicycle. Triple-certified for all wheeled sports.
In this guide I’ll walk you through everything — picking the right unicycle, gearing up safely, mounting without face-planting, your first wobbly pedal strokes, how to stop falling backward, and the drills that finally make it click. By the end you’ll have a clear roadmap from “I just unboxed this thing” all the way to “I rode 100 feet across the parking lot and nobody can tell me anything.” Let’s go.
To ride a unicycle as a beginner: set the saddle so your leg has a slight bend at full extension, hold a wall or rail with one hand, mount with the back pedal at 6 o’clock, sit your weight squarely on the seat, lean slightly forward, and pedal in smooth half-strokes while looking 10–15 feet ahead. Practice 20–30 minutes daily and most adults ride free within 2–4 weeks.
Table of Contents
- Choosing the Right Unicycle for Beginners
- Safety Gear You Actually Need
- Setting Up Your Unicycle Correctly
- How to Mount a Unicycle (Step-by-Step)
- Your First Pedal Strokes Along a Wall
- Letting Go: Riding Free for the First Time
- Turning, Stopping, and Free Mounting
- Common Mistakes (and How to Fix Them)
- Myths vs Facts About Learning to Unicycle
- Related Concepts and Skills
- Frequently Asked Questions
- Final Beginner Checklist
This article is part of our guide to electric rideables, which covers electric unicycles, Onewheels, electric skateboards, kick scooters and mopeds.
1. Choosing the Right Unicycle for Beginners
The single biggest mistake new riders make happens before they even step on the pedals — they buy the wrong unicycle. A wheel that is too small feels twitchy and dumps you forward. One that is too tall is hard to mount and scary to fall off. Get this part right and you save yourself weeks of frustration.
For most teens and adults under six feet tall, a 20-inch wheel is the gold standard. It rolls slowly enough that you have time to react, yet it is large enough to roll over small cracks and pebbles without throwing you. You can see options on Amazon if you want to compare brands and price ranges side by side.
Pick Your Wheel Size by Body Size
2. Safety Gear You Actually Need
Let me say this plainly: you will fall. Every rider does. The question is whether you bounce up laughing or limp home with a bruised wrist. Good gear is the difference. None of this needs to be expensive — basic protection costs less than a single emergency-room copay.
Here is the gear I make every student wear before they touch a pedal:
- ✅ Helmet (non-negotiable): A skate-style or bike helmet that meets CPSC standards. CPSC bicycle safety guidance applies here too — head injuries are rare in unicycling, but they are the only injury you cannot walk away from.
- ✅ Wrist guards: When you fall, you instinctively put your hands out. Skateboard-style wrist guards prevent the most common serious injury new riders see.
- ✅ Shin pads or long socks: The pedals have metal pins. They will scrape your shins. Soccer shin pads or thick wool socks cover the gap most pedals reach.
- ✅ Knee pads: Optional but smart for the first ten hours. Concrete is unforgiving.
- ✅ Flat-soled shoes: Skate shoes, Vans-style sneakers, or running shoes with flat tread. Avoid hiking boots (too stiff) and flip-flops (please, no).
3. Setting Up Your Unicycle Correctly
A poorly adjusted unicycle is like a poorly tuned guitar — you can technically play it, but everything fights you. Five minutes of setup saves hours of struggle.
Saddle Height
Sit on the seat with one heel on the lower pedal at the 6 o’clock position. Your leg should be almost straight, with just a slight bend at the knee. If your leg is fully locked, the seat is too high. If your knee is bent like you’re sitting in a chair, the seat is way too low and your legs will burn out fast.
Tire Pressure
Check the sidewall for the recommended PSI range. For learning, inflate to roughly the middle of that range. A rock-hard tire bounces; a soft tire feels mushy and wastes effort. Around 30–40 PSI works for most 20-inch trainer unicycles.
Pedal and Crank Check
Spin the wheel by hand. It should rotate freely with no wobble. Push side-to-side on the cranks — there should be zero play. If anything feels loose, tighten the bolts before you ride. Loose cranks can strip the axle within minutes of pedaling, ruining the unicycle.
“The setup is half the skill. I have watched students struggle for an hour, then ride 20 feet on their first try after I lowered the seat by half an inch.” — coaching note from a youth wheel-sports clinic
4. How to Mount a Unicycle (Step-by-Step)
Mounting is where everyone wipes out at first. Don’t worry — there is a specific technique and once you feel it click, you’ll never forget it. We’ll start with the easiest version: the wall-assisted mount.
The Wall-Assisted Mount, Step by Step
- Stand next to a wall with the wall on your dominant-hand side. Place the unicycle in front of you, wheel pointed forward.
- Position the back pedal at 6 o’clock (the bottom). The pedal closer to you should be at the bottom of its circle.
- Hold the front of the seat with one hand and place the wall hand on the wall for support. Tilt the seat slightly forward into your crotch — yes, really, that’s the riding position.
- Step up onto the back pedal with your dominant foot. The seat is now between your legs, not yet supporting your full weight.
- Sit your weight onto the seat as your other foot rises and finds the front pedal at 12 o’clock.
- Pause and breathe. You should feel the seat carrying about 80% of your weight. Hands light on the wall.
- Rock back and forth in place a few times before trying to ride. This builds the feel of how the wheel responds to pressure.
5. Your First Pedal Strokes Along a Wall
Here’s the moment things get fun. With the wall on one side and your hand sliding lightly along it, you’re going to teach your body what “rolling” feels like. The single goal of this phase is muscle memory — not distance, not speed, not looking cool.
The Half-Stroke Drill
Instead of trying to pedal full circles, push the front pedal forward only a half rotation, pause as the other pedal arrives at the top, then push that one a half rotation. Slow, deliberate, controlled. Practice this for 10–15 minutes at a time.
Where to Look
Look 10 to 15 feet ahead. Not down at the wheel — never down. Your body follows your eyes. The moment you stare at the ground, your weight shifts forward and you tip off. Pick a spot at the end of the wall and stare at it like it owes you money.
Body Position Cheat Sheet
- Hips: stacked over the seat, not behind it
- Shoulders: relaxed, slight forward lean
- Free arm: out for balance, like a tightrope walker
- Wall hand: light, just fingertips brushing — not gripping for life
- Eyes: forward and up

6. Letting Go: Riding Free for the First Time
This is the breakthrough moment. After enough wall practice — usually somewhere between 5 and 10 hours of total seat time — your body knows what to do. Now it just needs you to trust it.
The Push-Off Method
Mount as usual against the wall. Take one or two pedal strokes along the wall to get rolling. Then simply stop touching the wall and keep pedaling. Don’t think about it. Don’t announce it to yourself. Just lift your fingers and ride.
You will probably make it 3 to 8 feet on your first attempt. That’s normal. That’s perfect, actually. Step off the front, walk back, mount up, do it again. Within 30–40 attempts most people are riding 30 to 50 feet. Within a week of daily practice, 100 feet is realistic.
How to Step Off Safely
When you feel yourself losing balance, step forward off the front of the unicycle while letting it fall behind you. The seat handle (or the seat itself on basic models) makes a natural grab point. Catching the saddle as you step off saves the unicycle from clattering on the ground.
Real-world example: One of my students, a 47-year-old accountant who had never balanced on anything in her life, hit her first 50-foot ride on day 14. She filmed it, sent it to her group chat, and now her whole family is learning. Patience compounds.
7. Turning, Stopping, and Free Mounting
Once you can ride 100 feet in a straight line, three new skills open up. Take them in order — each one builds on the last.
Turning
You don’t turn a unicycle by twisting the handlebars (you don’t have any). You turn by twisting your hips and shoulders in the direction you want to go. Start with very gentle arcs in a wide-open space. Look toward where you want to end up — your body will follow your gaze.
Stopping
Slow down by gradually reducing pedal pressure, then either step off the front or use the unicyclist’s classic “rock-back” — pedal half a stroke backward to stall the wheel, hop forward off the front, and catch the seat. With practice this looks effortless.
The Free Mount
The free mount — getting on without a wall — is the final beginner milestone. Place the back pedal at 6 o’clock with your foot lightly resting on it (this holds the wheel still). Step up firmly with your other foot to the front pedal at 12 o’clock, and immediately pedal forward. The forward motion stabilizes you. Expect 50–200 attempts before this clicks.
Beginner Skill Timeline at a Glance
8. Common Mistakes (and How to Fix Them)
I’ve coached enough people to know that beginners make the same five mistakes, in roughly the same order. Here’s the cheat sheet so you can skip them.
- ❌ Mistake 1: Looking down at the wheel.
✅ Fix: Pick a target 10–15 feet ahead and stare at it. Your balance lives in your eyes more than your feet. - ❌ Mistake 2: Standing on the pedals instead of sitting on the seat.
✅ Fix: Consciously drop your hips. About 80% of your weight should rest on the saddle. - ❌ Mistake 3: Death-gripping the wall.
✅ Fix: Use only your fingertips. The wall is a guide, not a crutch. If you grab it, you can’t actually balance. - ❌ Mistake 4: Stiff, locked arms.
✅ Fix: Hold your arms out wide and loose like a tightrope walker. Tension in your shoulders travels straight to the wheel. - ❌ Mistake 5: Practicing for two hours straight, getting frustrated, quitting for two weeks.
✅ Fix: Short daily sessions of 20–30 minutes beat marathon weekends. Sleep is when balance gets wired into your brain.
9. Myths vs Facts About Learning to Unicycle
10. Related Concepts and Skills
Once you have the basics down, the unicycle world opens up surprisingly wide. Here are the next directions most riders explore:
- Idling: Rocking the wheel back and forth in place to stay balanced without moving forward. Essential for crowded riding. (See our guide to unicycle idling techniques.)
- Mountain unicycling (MUni): Off-road riding on knobby tires. Uses 24-inch or 26-inch wheels with brakes.
- Distance / commuter unicycling: 29-inch and 36-inch wheels with handlebars for long, fast rides.
- Freestyle and flatland tricks: One-foot riding, wheel walking, hops, and seat-out skills. (See our beginner unicycle tricks roadmap.)
- Electric unicycles (EUCs): A completely different vehicle — self-balancing, motorized, much faster.
11. Frequently Asked Questions
How long does it take to learn to ride a unicycle?
Most beginners can ride 30 to 100 feet within 10 to 20 hours of focused practice spread over two to four weeks. Adults who practice 30 minutes a day usually get their first solo ride in roughly two weeks.
What size unicycle is best for beginners?
A 20-inch wheel is the most common starter size for teens and adults under six feet. It is slow, stable, and easy to control. Riders over six feet may prefer a 24-inch wheel, while children under nine usually do best on a 16-inch.
Is learning to unicycle harder than learning to ride a bike?
Yes, unicycling is harder at first because you must balance front-to-back as well as side-to-side, with no handlebars and no second wheel. However, after the first 10 hours of practice, the learning curve flattens quickly and the skill sticks for life.
Do I need special shoes or pads to learn?
Flat-soled shoes with a firm grip work best. A helmet is essential. Wrist guards, knee pads, and shin guards are strongly recommended for the first 20 hours since shin scrapes from the pedals are common.
Can adults learn to ride a unicycle?
Absolutely. Adults learn unicycling every day. Patience matters more than age or athletic background. Most people in their 30s, 40s, and 50s pick it up within a month of consistent practice — and many find adults outperform kids because they follow technique more carefully.
Why do I keep falling backward when I try to ride?
Falling backward usually means your weight is behind the wheel. Lean your upper body slightly forward, keep your eyes up, and apply gentle forward pressure on the pedals. The unicycle should travel under you, not in front of you.
Summary: The Big Picture
Learning how to ride a unicycle for beginners is genuinely one of the most rewarding skills you can pick up as an adult. It takes patience, not talent. Every hour you put in moves you forward, even if you can’t feel it that day.
To recap the path: pick a 20-inch wheel, set the seat so your leg has a slight bend, gear up with a helmet and pads, find a long wall, and practice mounting and short pedaling sessions for 20–30 minutes a day. Look forward, sit on the seat, lean slightly into the ride. Within a couple of weeks of steady effort, you’ll get your first 50-foot ride — and from there, everything compounds.
12. Final Beginner Checklist
Before your next practice session, run through this list:
- ☐ 20-inch (or correctly sized) unicycle inflated to mid-range PSI
- ☐ Saddle height — slight knee bend at the bottom of the stroke
- ☐ Helmet on, wrist guards on, shin pads or long socks on
- ☐ Flat-soled shoes
- ☐ Smooth pavement and a long wall, fence, or rail nearby
- ☐ 20–30 minutes blocked off (no rush)
- ☐ Eyes up, hips on the seat, fingertips light
- ☐ One small goal for today (a longer wall ride, a smoother mount, a first letting-go)
Further Reading
- How to Idle on a Unicycle: Step-by-Step (HoverboardsGuide)
- Beginner Unicycle Tricks Roadmap (HoverboardsGuide)
- Electric Unicycles vs Traditional Unicycles (HoverboardsGuide)
- CPSC Bicycle & Helmet Safety Education (Government source)
- International Unicycling Federation (Governing body)
This article is educational and reflects coaching best practices. It is not buying advice or a substitute for in-person instruction. Always wear protective gear and practice in safe environments.